Monday, August 22, 2016

Oatmeal Crazies


What do you do when you want to make cookies, but you’re missing certain ingredients? If you’re really desperate for a chewy, yummy treat, the answer is clear. You improvise! The secret is to search the cupboards and refrigerator for any kind of substitution that will tickle your taste buds and make your face smile. Its like playing your own version of Chopped, for desserts only.

There are some substitutions that are easy to manipulate. For instance, its simple to swap white chocolate chunks for chocolate chips, or perhaps your favorite candy coated chocolate pieces, or peanut butter flavored ones. Sometimes its even okay to substitute oil for soft shortening, or butter. The options are endless, depending on what you have on hand. What happens, however, when you don’t have enough butter to make your ultimate oatmeal raisin cookie? Or perhaps, you don’t even have raisins! Are there other options to use and still have a decent treat to enjoy with your evening tea? After researching my dilemma, I found a perfectly great substitution that was actually a better health choice.

I called my new cookie, Oatmeal Crazies. They are very similar to my original oatmeal raisin cookie, but with a few recipe changes, which proved to be quite delicious. My story began with the problem that I did not have enough butter for my recipe. I also realized that I didn’t have enough raisins for my recipe either. I did, however, promise my son to make cookies for his daily snack at work. The obvious solution would have been to go to the store and buy the ingredients that I was missing. The problem was that I didn’t have the means to get to my nearby grocery establishment. I decided to look up an alternative solution on the internet. It turns out that applesauce is a fair substitution for shortening. Most chefs will tell you that it doesn’t work for cookies, because they won’t turn out chewy or crispy. That was not a problem for me, because I like my oatmeal raisin cookies soft and fluffy anyway. Oatmeal, itself, provides a chewy texture, so I decided to experiment with the applesauce anyway. I also needed to think creatively with my raisins. Any other time, I would have given up, or used chocolate chips.  This time, my choices were few. I did, however, have a giant bag of dried cranberries that someone had given me. The idea seemed like a perfect match.

With any substitution, there are a few things that need to be accommodated. When using applesauce, there is no real “creaming” together with the sugar. It turns out to be a sloppy mess of liquid. Adding a touch more flour helps the situation tremendously. I also learned that cookie sheets don’t necessarily need to be greased, but it did help. Unsweetened applesauce also elevates the cinnamon and nutmeg flavor, so the combined flavor was truly incredible. All in all, once the cookies baked and cooled, the recipe was a success. It’s also nice to know that these cookies contain less fat and more fruit, and are actually better for me and my family.

Oatmeal Crazies 

Ingredients:

2 eggs
2 teaspoon vanilla extract
2 cup dried cranberries

1 cup of unsweetened applesauce
1 cup firmly packed brown sugar
½ cup granulated sugar

2 cups all-purpose flour
1 teaspoon baking soda
2 teaspoon ground cinnamon
1 tsp nutmeg
½ tsp ginger  or pumpkin spice
½ teaspoon salt

3 cups quick or old fashioned, uncooked oatmeal

Directions: 

Heat oven to 350°F.
Combine eggs, cranberries, & vanilla in separate bowl. Stir and let stand. This hydrates the berries.

In large bowl, beat applesauce and sugars until thoroughly incorporated.  Add flour, baking soda, cinnamon, nutmeg, ginger and salt; mix well.

Add the egg, cranberries, and vanilla combination. Beat well.  Add oats. Dough will be  stiff and sticky. It  may be necessary to finish stirring by hand.

Drop dough by rounded tablespoonfuls onto  lightly greased cookie sheets.

Bake 10 to 12 minutes or until light golden brown. Cool 1 minute on cookie sheets; remove to wire rack. Cool completely. Store tightly covered.

Servings: ABOUT 6 DOZEN

Bar Cookies: Press dough onto bottom of  lightly greased 13 x 9-inch baking pan. Bake 30 to 35 minutes or until light golden brown. Cool completely in pan on wire rack. Cut into bars. Store tightly covered, 24 BARS


Helpful Substitutions for your baking pleasure:

Baking Powder (1 tsp) = 1/3 teaspoon baking soda plus 1/2 teaspoon cream of tartar

Baking Soda(1 tsp) = 2 tsp Baking powder and omit salt in recipe

Cream of tartar (1 tsp) = 1 teaspoon white vinegar or 1 tsp lemon juice

Buttermilk (1 cup) = 1 tablespoon lemon juice or vinegar plus enough milk to make 1 cup (let stand 5-10 minutes), or 1 cup plain yogurt or 1 cup sour cream

Butter (1 cup) = 3/4 cups of vegetable oil or 1 cup of applesauce

Unsweetened baking chocolate (1 oz ) = 3 Tbsp baking cocoa plus 1 Tbsp vegetable oil

Light Brown Sugar = 2 tablespoons molasses plus 1 cup of white sugar

Confectioner's/Powdered Sugar = Finely ground 1 cup sugar plus 1 tablespoon cornstarch

For more baking substitutions, check out this site. http://chefinyou.com/articles/substitutes-in-baking-101/

Tuesday, August 9, 2016

Summer Loving Cookies


The summer sun swelters high in the sky. The afternoon is filled with hot, humid air. Children’s music is heard down the block from the ice cream truck making its rounds. Ice cold bottles drip with condensation. No one is hungry, but something sweet to eat would hit the spot. It needs to be light, puffy, and yet full of flavor. A delicate hint of lemon would take the edge off of such a sizzling day.  Pink lemonade would be the perfect drink, but you’re in the mood for a cookie. 

Although the weather may be daunting with heat and no one wants to turn the oven on, it is possible to bake an afternoon treat in the cooler hours of the evening. A clever baker will also turn the air conditioner up while turning the oven on. Thereby creating the illusion of a cooler atmosphere and perfect for baking! Either way, these lemonade cookies are worth the 15 minutes of a hot oven. The recipe is fast and easy, and the results are the equivalent of chilled glass of lemonade, complete with the sweetness of sugar and the tart pucker of lemon together in one bite. Everyone will enjoy these plump cookies bathed in their favorite summer beverage.  Try them for yourself first, then invite your friends over for some summer fun and cool treats. You won’t regret it!

(This is another recipe from the Cake-Mix Cookie collection selection.)


Lemonade Cookies

Makes approximately 48 cookies.

Ingredients:

1 box lemon cake mix
2 large eggs
4 oz of frozen whipped topping. (1/2 of an 8-ounce container) thawed
1 tsp lemon juice

1 cup confectionery sugar
½ cup pink lemonade drink mix

Directions:

Preheat oven to 350 degrees F.

Mix confectionery sugar and lemonade mix in separate bowl. Set aside.

In another bowl, combine cake mix, eggs, lemon juice, and whipped topping. Stir through completely. (Dough will be thick and sticky.)

With a teaspoon, scoop out dough and shape into ¾ inch balls. Place 2 inches apart on ungreased baking sheets. Bake 10 to 12 minutes, or until set and cookie tops have cracked slightly. Remove cookies to wire racks.

While cookies are still warm,  roll each one in the confectionery lemonade mix until thoroughly coated.   (Its also possible to put sugar mix in large seal-able bag and shake cookies lightly until covered.)

Now you can have your cookie and lemonade too!


Wednesday, August 3, 2016

Cake Mix Cookies


My younger sister is a wonder to behold. She has four children ages 10 through 18; she works full time Monday through Friday , plus she holds down a second job on the weekend to help pay for her son’s tuition to private school.  She manages to keep house and still be a devoted wife. I’m exhausted just thinking about her life. Through it all, she also cooks amazing meals with a dessert thrown in for good measure. So when she asked me if I knew any recipes that were quick and easy to fix, I thought long and hard. Most of my treats are made from scratch, with flour, sugar, eggs, and all the other ingredients needed for a finished product. They may be simple, but can be time consuming. To help her out, I searched my collection of recipes and  came across this kitchen hack for making a chocolate mint crinkle cookie. It consists of only 4 major ingredients along with a few teaspoons of peppermint. The end product is soft, sweet, lightly minted, and loaded with chocolate. It’s also very quick to make and faster to eat. 

I originally made this cookie when I was looking for something that would be sweet, but not detract from my weight loss program. There is no oil or butter to be added. Only cake mix, eggs, and fat free whipped cream. The cookies are large and rich in flavor, so enjoying a couple with my cup of tea did not make me feel heavy or defeated. After experimenting with the chocolate fudge cake mix, I definitely will try other flavors such as orange, lemon, and maybe even carrot. The possibilities are as endless as your imagination and selection at the local grocery store. 

Chocolate Mint Crinkle Cookies 

Ingredients:

1 box chocolate fudge cake mix
2 large eggs
4 oz of frozen whipped topping. (1/2 of an 8-ounce container) thawed
1 TBL peppermint flavoring

1 cup confectionery sugar

Directions:

Preheat oven to 350 degrees F.

In a large bowl, combine cake mix, egg, and whipped topping, stir thoroughly. (Dough will be thick and sticky.)

Dust hands with confectioners' sugar. With a teaspoon, scoop out dough and shape into 3/4-inch balls. Roll the balls in the confectionery sugar. Place 2 inches apart on ungreased baking sheets.

Bake 10 to 12 minutes, or until set and cookie tops have cracked. Remove cookies to wire racks to cool.  Makes 48 cookies. Enjoy with a cold glass of milk or great cup of tea!

Wednesday, June 22, 2016

E Z Macaroons


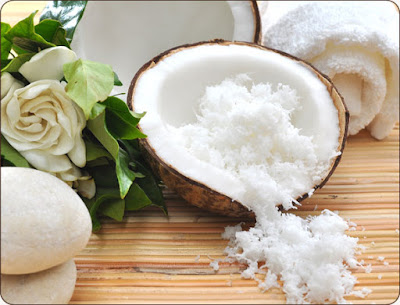
I am an avid coconut fan. I love it in candy, on my ice cream, as my coffee flavoring, and topping my donuts. Some people don’t like the texture and some people are allergic to it, but I enjoy every mouthful of that tropical goodness, especially as a cookie. Coconut macaroons are a simple treat that doesn’t take long to make or bake. They are used for many occasions, such as Easter, Passover, Christmas, Baby Showers, and every other Tuesday. Just kidding, we all know its every other Thursday.  

In my cookie recipe, I prefer to add a small bit of almond flavoring to accentuate the sweetness of the coconut. I’m sure there are other flavors that could be used, such as orange, vanilla, or even chocolate. Please feel free to experiment. I’ll be honest, I only stick with the almond because once I start craving macaroons, I crave the exact taste of that almond too. (If my sister is reading this, just give up Tarcia. Don’t even make this recipe. Its not worth you or Taylor getting hives or becoming violently ill. My sister is allergic to almond, my niece is allergic to coconut. Bad situation for both of them.)

The only thing better than a chewy coconut treat alongside a large cup of orange pekoe tea, is to find a recipe for these delicacies that is easy and quick to make. This recipe is a keeper. There are not many steps and its easy to follow. It’s also a great way to teach your children some basic kitchen skills. No mixer is needed, just a handy spoon. Not only do the cookies come out firm and delicious out of the oven; they taste even better the next day - that’s if you have any leftovers. 

EZ Macaroons

Makes 20 small cookies

Ingredients:

1 2/3 cups coconut (sweetened)
1/3 cup sugar
3 tablespoons flour
2 egg whites
1 teaspoon almond extract

Directions

Combine sugar, flour, and coconut in a mixing bowl. Stir thoroughly, making sure all dry ingredients are incorporated.  Add almond extract and stir again. Stir in egg whites, one at a time making sure mixture is completely combined.  Mix well. 


Roll into teaspoon size balls or drop from teaspoon onto lightly greased baking sheet. Bake at 325 degrees for 15 to 18 minutes or until the edges of the cookies are golden brown. Remove cookies from cookie sheet immediately after baking. Let cool and enjoy!!


***If you’re feeling very decadent, this is an excellent cookie for dunking in chocolate too. Melt your favorite chocolate in the microwave or through a double boiler, (Or for an extra easy way, buy the dipping chocolate at your local grocery store) and dip ½  of your baked macaroon into the chocolate pool. You can also drizzle the chocolate across the top. Allow to dry.***

Thursday, March 31, 2016

Flavors Remembered - Donuts from the Past


The First of Many Recipes from a new chapter of Flavors Remembered.

Over the years, there have been so many pastries and desserts that I have tasted and absolutely loved. They left an impression on my taste buds to last for as long as I can remember. The problem is that these delicious delicacies were items that I bought at a restaurant, store, or donut shop. These goodies were brought anonymously as a potluck dish to a church gathering or family reunion. I had no idea how some of my favorite foods were made,  because no one was willing to give up the recipe.  Restaurants hate to give up their secrets and family members don’t write anything down. Therefore I set out on a private scavenger hunt for recipes to duplicate some of these scrumptious desserts. 

I have an obsession with donuts. I am enthralled with the flavors and the concoctions that bakers use to produce these round treasures. I will watch anything on television that centers around these remarkable yummy treats. If I even see a commercial showing light, airy dough stuffed with a light chocolate cream, and showered with white powdery sugar, I suddenly need that confectionary goodness.  I am a devout Dunkin Donuts aficionado, (I’m an East Coast girl, y’know), but I will settle for a “hot off the rack Krispy Kreme Glazed” when its available. 

However, one of my all time favorite donuts came from neither of these two big establishments. I found the best Chocolate Coconut Covered Donut in a little shop on a side street in my hometown of Portland, Maine. “Tony’s Donuts” was a “mom-n-pop” shop run by the friendly Fournier family, who specialized in delicious decadent donuts fresh out of the oven. The best part was that the shop was open on Sunday mornings so everyone could enjoy  warm, delicate donuts with their weekend breakfast. That’s how I discovered them. 

Tony’s Chocolate Coconut Covered donuts consisted of a deep dark chocolate base that easily melted in your mouth. I’m not sure if they were baked or fried, but I honestly couldn’t tell the difference back then. It just wasn’t important. What did matter was the gentle vanilla glaze that helped to embrace the abundantly sweet, moist shredded coconut coating all over this masterpiece. The richness of the chocolate paired so well with the fresh white tropical fruit. 

It’s been years since I have moved from Maine to Virginia, but when I think of donuts, I still remember the taste of  my favorite donut. In order to satiate this craving, I have had to develop my own recipe. From time to time, as I experimented, some elements were good, others were horrible. One batch was overly greasy, another too dry. Recently I found a recipe that came exceptionally close to what I remember. I was totally amazed that the donut continued to be moist for more than one day. I still think it might need to incorporate darker chocolate, but I will conquer this as well. For now, I will share my recipe. Anyone who appreciates chocolate and coconut will love this recipe. However, if you live close to “Tony’s Donuts” in Portland, Maine - please go there and try the original. If you would like to ship some to me, I will eat them with the same gusto that I did the first time. And if Tony or his family would like to share their recipe with me, (secretly, of course), I won’t tell anyone. 

CHOCOLATE COCONUT COVERED DONUTS

Makes approximately 10 - 12 large donuts or 24 mini donuts.

INGREDIENTS:

Donut Batter:
1 cup flour
1/2 cup sugar
1/3 cup cocoa powder
1/2 tsp baking soda
1 TBL vanilla extract
1 egg
6 TBL sour cream
1/4 cup milk
1/4 cup vegetable oil

For the glaze:
1 cup powdered sugar
3 TBL milk
2 tsp vanilla

7 oz bag of shredded sweetened coconut.

DIRECTIONS:

Preheat oven to 375 degrees. Grease donut pan.
(Preheat mini donut machine, if applicable)

In a large bowl, combine the flour, sugar, cocoa powder, and baking soda.
In a separate bowl, beat together the milk, oil, vanilla, egg, and sour cream.
Add the wet ingredients into the dry and stir lightly until combined.
Spoon in a greased donut pan.

Bake for 7-9 minutes depending on your oven. When the tops spring back, they are done.  (If using mini donut machine, follow machine’s instructions.)

Let the donuts cool slightly while making your glaze.

Glaze Directions:
In a medium bowl stir together the sugar, milk, and vanilla until well combined.

When finished, gently drop donut into glaze. Then cover with coconut.

Place coconut in deep bowl. Dunk donut in coconut after glazing, or sprinkle coconut on thoroughly until completely covered.  Place on waxed paper to set. Let sit for a few moments while you get your coffee and tea ready.

Sit back and enjoy!


Thursday, March 17, 2016

No Blarney Here!


Springtime is almost here! The trees near my home are blooming with carnation pink and white flowers, and the robins are singing sweetly in the early morning sunshine. Daylight saving time has begun so the days are warmer and brighter longer. Friends are running around with their short sleeve shirts and flip flops, and I am making one of my favorite meals for March. 17th. 

On Saint Patrick’s Day, everyone claims to be Irish! My family, however, is definitely Irish with a dash of Scottish thrown in as well. My son just researched my father’s side of the family and discovered our real heritage. We always knew we were Irish (with a name like Maguire - how can you not be), but the Scottish was a bit of a surprise. Although if you see my profile picture, you could spot it a mile away. 

I relate to the Irish side of my background more so than the Italian side of my mother.  While everyone else is devouring assorted Italian dishes of lasagna, fettuccini alfredo, and gnocchi, I prefer a meal filled with potatoes, cabbage, and corned beef. I tend to shy away from recipes with lots of noodles bathed in loads of cheese. And don’t even ask me about parmesan or feta. Yuck!! 

On this prestigious saintly holiday for the Irish, I have prepared corned beef and cabbage in my crock pot. It was the largest container I had to cook this incredible meal. In the slow cooker, I also added potatoes, carrots, and a few small turnips too. I will admit, I love the fact I didn’t have to slave over the hot stove to cook this year. Instead I decided to use the time to make my famous Irish Soda Bread. it’s an easy recipe that I found a few years ago, and now I make it whenever the  fancy arises. On March 17th, it’s a given. 

I love this recipe because it doesn’t call for any yeast or time for rising.  I can basically throw the ingredients in a bowl and  have a fresh loaf of bread in less than an hour. (As a matter of fact, this blog took longer to write than the bread did to bake. My timer just rang.) The texture is light and airy, and the flavor compliments any Irish meal you could concoct. The only ingredients you may need to buy that aren’t in your cupboard regularly are caraway seeds and golden raisins.  It’s possible to use dark raisins, but they aren’t as sweet or pretty in the bread as golden are. 

Below is my recipe for my Irish Soda Bread. Everyone I have ever talked to has their own version. I like this one because it is easy. Try it in your own home and feel free to personalize it for you and your family. I’m sure you could leave out the raisins or substitute them for something else, but I’m not sure what. Let me know if  you try it a different way.  Happy St. Patrick’s Day!

May you always have work for your hands to do.
May your pockets hold always a coin or two.
May the sun shine bright on your windowpane.
May the rainbow be certain to follow each rain.
May the hand of a friend always be near you.
And may God fill your heart with gladness to cheer you.


Irish Soda Bread

Makes 1 round loaf

Ingredients:

3/4 cup milk
2 tsp vinegar
2 Tbsp  oil
2 cup plus all-purpose flour
2/3 cup golden raisins
4 tsp caraway seeds
1 tsp baking soda
1/2 tsp baking powder
1/2 tsp salt

Directions:

Preheat oven to 325ºF. Position a rack in the center of the oven.

Whisk the milk, vinegar, and oil in a medium bowl; set aside.

In large bowl, stir together flour, raisins, caraway seeds, baking soda, baking powder and salt. Stir the wet mixture into the dry mixture with a wooden spoon. Combine until thoroughly moistened.

Lightly dust work surface with flour. Turn the dough out and knead for 30 seconds, just until it coheres. Shape into a round loaf about 6 inches in diameter and 1 inch high.

Using a sharp knife and cut an "x" about 1/2 inch deep in the top of the loaf.

Lightly spray a baking sheet with nonstick spray, place the loaf on it. Bake until lightly browned and crusty, about 45 minutes. Transfer to a wire rack to cool for at least 15 minutes before slicing.

Enjoy!